Running your Event
Events are run via the Director. To access the Director, open your Event and click the red Director button.
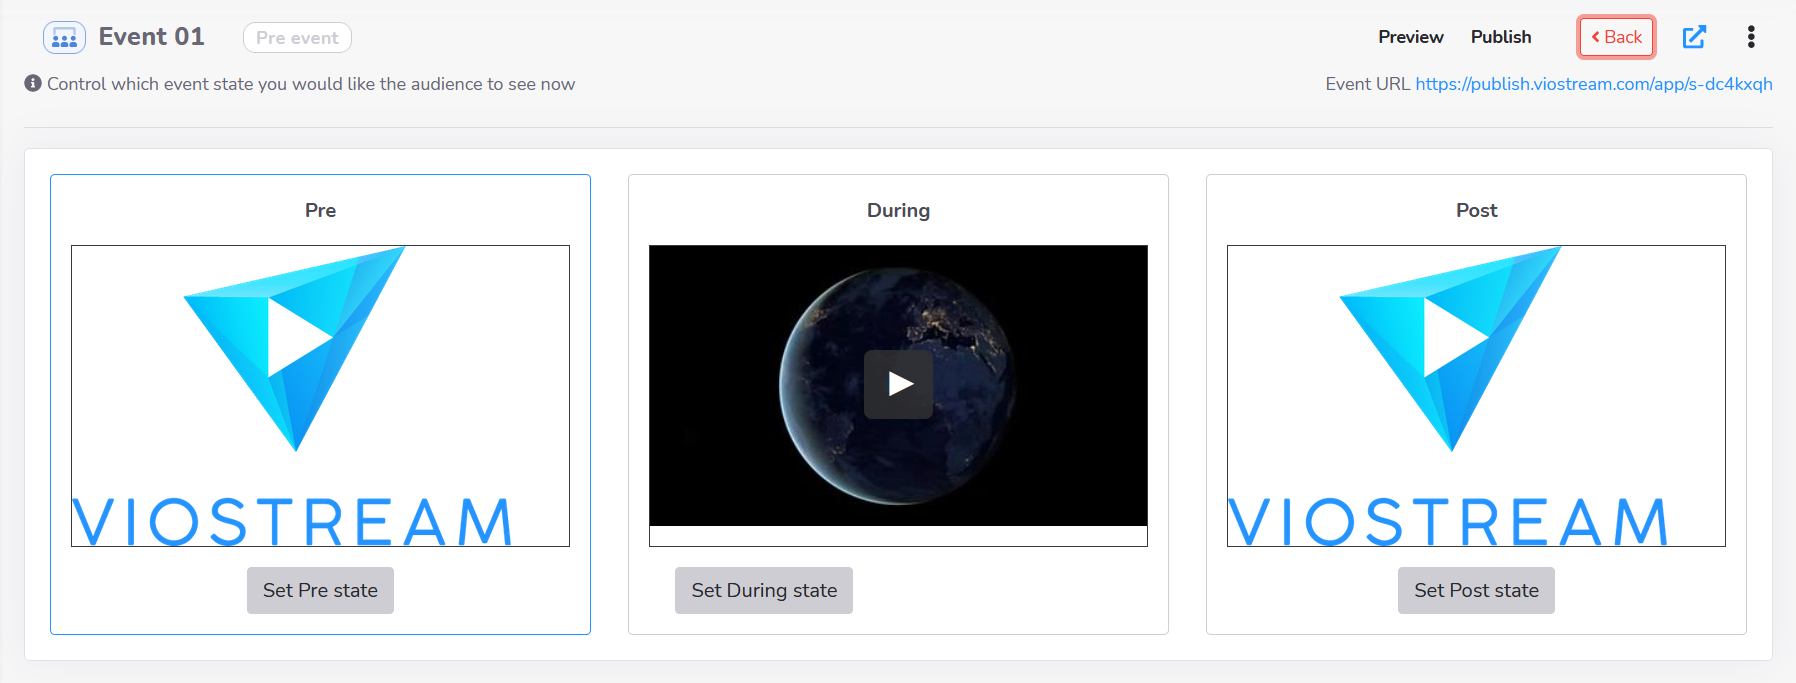
Event States
The Director controls three states which will be used during the lifecycle of your Event.
- Pre
- During
- Post
The Pre state will be the default state when you first create your Event. This state is used to display information about the Event before it starts.
The Pre state displays a holding slate or video. On the day of your Event, you can remain in the Pre state while your are testing your live streaming setup. One you are happy with the setup, you can send a live pre-event slate from your streaming equipment and switch your event to the During state.
We recommend switching to the During slate around 10-15 minutes before the scheduled start time of your Event. This allows your viewers to join the stream and ensure their setup is working correctly in advance of the start.
The During state is where your live stream is displayed to your viewers during the Event.
Once your live stream concludes, we recommend sending a live post-event slate from your streaming equipment for a few minutes before switching to the Post state. This ensures that any viewers whose playback is slightly delayed due to local network conditions will see the conclusion of the live stream before being switched to Post.
The Post state is displayed to your viewers at the conclusion of the Event. This is generally a short-lived state that is displayed while an on demand version of the Event is being created, however if you are not providing an on demand version for your viewers you can leave the Event in the Post state indefinitely.
Controlling States
To switch between states, you can use the Set Pre state, Set During state, and Set Post state buttons. Confirm your selection by clicking OK. Generally speaking an Event will flow from Pre, to During, to Post, however there is no restriction on which state you can set your Event to.
Recording the Event Timeline
You can record the start and end times of your Event by using the Start Broadcast and End Broadcast buttons. These buttons will record the times so that you can view them later in the Reports tab.
Managing Slides
If you have uploaded Slides to your live asset, you can control the timing of the slides on your event with the Slide Syncer.
Setting the offset
Depending on the configuration of your live streaming equipment, playback of video in the browser can be between 15-90 seconds behind the actual event. To ensure that slides are synchronised with the live stream, you will need to determine how far behind the live action your browser is.
Before your event starts, you can set the slide offset by using a sync slate, clapper board or similar device.
- Ensure the live stream is playing back in the During preview window.
- Activate the sync slate or clapper board in front of the camera and click the Start offset timer button.
- Watch the live stream preview. When you see the sync slate or clapper board, click the Set button.
The slide offset has now been saved and will be added to the timings of any slides cued.
The slide offset is only saved for the current browser session. If you refresh the page or close the tab, you will need to re-synchronise. You can also manually set the offset by dragging the slider.
Pushing Slides
The Slide manager shows the cued slide on the left, and the current slide on the right. By default, the slides are cued in order, however you can manually adjust which slide is cued by using the arrows to the left or right of the cued slide.
To push the next Slide, click the Push cued slide button.
Switching to On Demand
Once you have finished your Event, you can upload an on demand version to your Library and add this to your Event.
- Click the Back button to return to the Event editor.
- Select the Ondemand tab.
- Click the Select Media link and choose the on demand version of your Event.
- Click the Enable OnDemand slider and click OK.